[프로젝트 리뷰] Spring Security OAuth2 소셜 로그인(구글, 네이버, 카카오) 구현
개발환경
- STS 4.16.1
- Springboot 3.0.1 (springsecurity6)
- Thymeleaf
- Java 17
- JPA
- Gradle 7.6
전체 레포지토리
GitHub - rkgh17/SeoulWalk: 휴먼 스프링부트 프로젝트
휴먼 스프링부트 프로젝트. Contribute to rkgh17/SeoulWalk development by creating an account on GitHub.
github.com
사전설정
네이버 / 구글 / 카카오 OAuth2 API 설정은 따로 기술하지 않습니다.
Gradle 의존성 추가
build.gradle
  dependencies{
	implementation 'org.springframework.boot:spring-boot-starter-web'
	compileOnly 'org.projectlombok:lombok'
	annotationProcessor 'org.projectlombok:lombok'
	testImplementation 'org.springframework.boot:spring-boot-starter-test'
	developmentOnly 'org.springframework.boot:spring-boot-devtools'
	implementation 'org.springframework.boot:spring-boot-starter-thymeleaf'
	implementation 'nz.net.ultraq.thymeleaf:thymeleaf-layout-dialect'
	implementation 'org.springframework.boot:spring-boot-starter-security'
	implementation 'org.thymeleaf.extras:thymeleaf-extras-springsecurity6'
	implementation 'org.springframework.boot:spring-boot-starter-validation'

  	//소셜 로그인 관련
	implementation 'org.springframework.boot:spring-boot-starter-oauth2-client'
  	//implementation group: 'com.googlecode.json-simple', name: 'json-simple', version: '1.1.1'
  }
application.properties 설정
인증 api 정보 설정
application.properties
spring.profiles.include=oauth
application-oauth.properties
# Google
spring.security.oauth2.client.registration.google.redirect-uri= 본인의redirect-uri
spring.security.oauth2.client.registration.google.client-id= 본인의client-id
spring.security.oauth2.client.registration.google.client-secret= 본인의client secret key
spring.security.oauth2.client.registration.google.scope=profile,email

# Naver
spring.security.oauth2.client.registration.naver.client-id = 본인의client-id
spring.security.oauth2.client.registration.naver.client-secret= 본인의client secret key
spring.security.oauth2.client.registration.naver.client-name=Naver
spring.security.oauth2.client.registration.naver.authorization-grant-type=authorization_code
spring.security.oauth2.client.registration.naver.redirect-uri= 본인의redirect-uri

spring.security.oauth2.client.provider.naver.authorization-uri=https://nid.naver.com/oauth2.0/authorize
spring.security.oauth2.client.provider.naver.token-uri=https://nid.naver.com/oauth2.0/token
spring.security.oauth2.client.provider.naver.user-info-uri=https://openapi.naver.com/v1/nid/me
spring.security.oauth2.client.provider.naver.user-name-attribute=response

# KaKao
spring.security.oauth2.client.registration.kakao.client-id = 본인의client-id
spring.security.oauth2.client.registration.kakao.client-secret = 본인의client secret key
spring.security.oauth2.client.registration.kakao.redirect-uri= 본인의redirect-uri
spring.security.oauth2.client.registration.kakao.authorization-grant-type=authorization_code
spring.security.oauth2.client.registration.kakao.scope=profile_nickname,account_email
spring.security.oauth2.client.registration.kakao.client-name=kakao
spring.security.oauth2.client.registration.kakao.client-authentication-method=POST

spring.security.oauth2.client.provider.kakao.authorization-uri= https://kauth.kakao.com/oauth/authorize
spring.security.oauth2.client.provider.kakao.token-uri=https://kauth.kakao.com/oauth/token
spring.security.oauth2.client.provider.kakao.user-info-uri=https://kapi.kakao.com/v2/user/me
spring.security.oauth2.client.provider.kakao.user-name-attribute=id
.gitignore
본인의 개인정보가 git에 올라가는게 싫다면 다음과 같이 수정
### OAUTH ###
application-oauth.properties
View
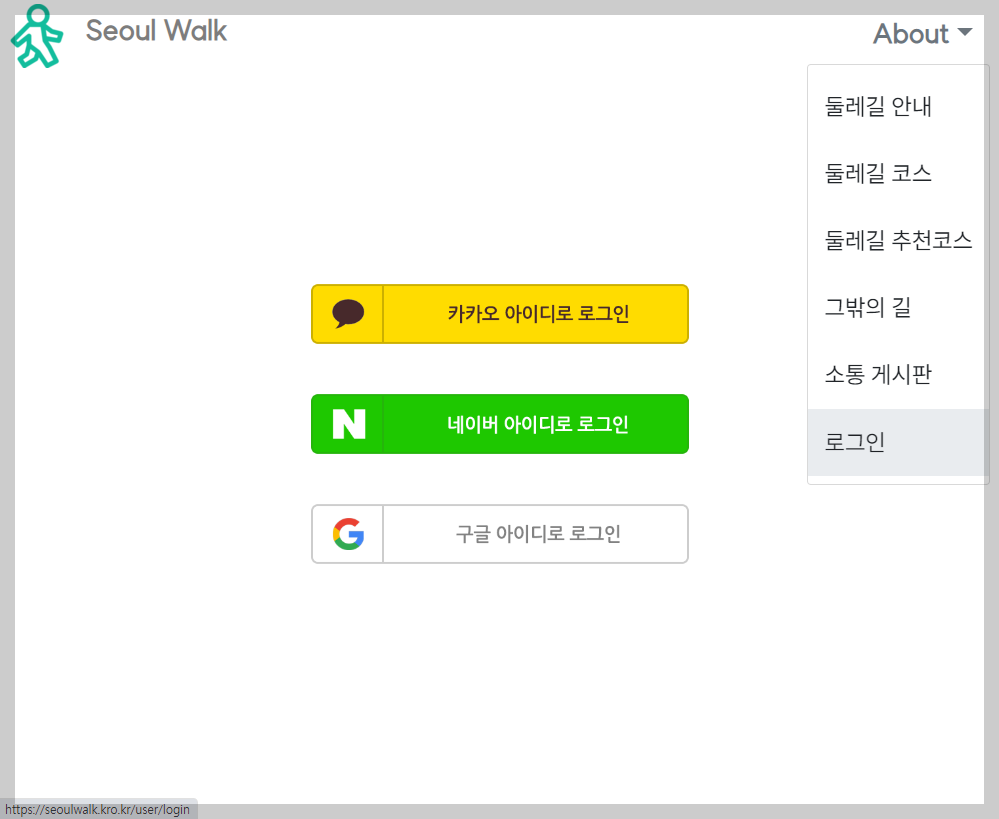
static 하위에 로그인 버튼 png 파일을 넣어주고, 로그인화면과 로그아웃 화면을 먼저 만들어 주었다
login.html
"/oauth2/authorization/..." 부분은 Spring Security에서 기본적으로 제공하는 url이다.
<html layout:decorate="~{layout}">
<div layout:fragment="content" class="logincontainer">

	<!--카카오-->
	<div class="sociallogin">
    	<a href="/oauth2/authorization/kakao">
    		<img th:src="@{/img/sociallogin/kakao_login.png}"
    			 class="img-responsive"
    			 alt="..."/>
    	</a>
	</div>

	<!--네이버-->
	<div class="sociallogin">
    	<a href="/oauth2/authorization/naver">
    		<img th:src="@{/img/sociallogin/naver_login.png}"
    			 class="img-responsive"
    			 alt="..."/>
    	</a>
	</div>

	<!--구글-->
	<div class="sociallogin">
    	<a href="/oauth2/authorization/google">
    		<img th:src="@{/img/sociallogin/google_login.png}"
    			 class="img-responsive"
    			 alt="..."/>
    	</a>
	</div>
</div>
</html>
▼로그인 화면보기
logout.html
<html layout:decorate="~{layout}">
<div layout:fragment="content">

	<div class = "logincontainer">


	<h2>로그아웃 하시겠습니까?</h2>

	<button style="border:0; border-radius:12px; margin-top:50px;
			   width: 200px; height:60px;
			   background-color:#1ABC9C">
		<a style="font-weight:bold;
				  font-size:23px;
				  color:white;
				  text-decoration : none;"


		 th:href="@{/user/logout/do}">로그아웃</a>
	</button>


	</div>
</div>
</html>
▼로그아웃 화면보기

Model
SiteUser.java
소셜 로그인 사용자 정보를 담을 Entity 생성
import jakarta.persistence.Column;
import jakarta.persistence.Entity;
import jakarta.persistence.GeneratedValue;
import jakarta.persistence.GenerationType;
import jakarta.persistence.Id;
import lombok.Builder;
import lombok.Getter;
import lombok.NoArgsConstructor;

@Getter
@Entity
@NoArgsConstructor
public class SiteUser{

	// user 고유번호
	@Id
	@GeneratedValue(strategy = GenerationType.IDENTITY)
	private Long id;

	// user name
	@Column(nullable = false)
	private String name;

	// user email
	@Column(unique = true)
	private String email;

	// user nickname
	@Column
	private String nickname;

	// user role
	@Column(nullable = false)
	private String role = "ROLE_USER";

	@Builder
	public SiteUser(String name, String email, String nickname, String role){
		this.name = name;
		this.email = email;
		this.nickname = nickname;
		this.role = role;
	}

	public SiteUser update(String name) {
		this.name = name;

		return this;
	}

}
UserRepository.java
unique key인 email을 이용하여 사용자를 찾기 위해 Repository 생성
import java.util.Optional;
import org.springframework.data.jpa.repository.JpaRepository;
import org.springframework.stereotype.Repository;

@Repository
public interface UserRepository extends JpaRepository<SiteUser, Long>{
	Optional findByEmail(String email); // 사용자 조회
}
OAuthAttribute.java
OAuth2 로그인을 통해 가져온 사용자 정보의 전달을 담당한다.
import java.util.Map;
import lombok.Getter;
import lombok.Setter;

@Getter
@Setter
public class OAuthAttributes {
    private Map<String, Object> attributes;
    private String nameAttributeKey;
    private String name;
    private String email;

    public OAuthAttributes(Map<String, Object> attributes, String nameAttributeKey, String name, String email) {
    	this.attributes = attributes;
    	this.nameAttributeKey = nameAttributeKey;
    	this.name = name;
    	this.email = email;
    }

    public OAuthAttributes() {
    }

    public static OAuthAttributes of(String registrationId, String userNameAttributeName, Map<String, Object> attributes) {

    	// 카카오-네이버-구글
        if(registrationId.equals("kakao")) {
    		return ofKakao(userNameAttributeName, attributes);
    	} else if(registrationId.equals("naver")) {
    		return ofNaver(userNameAttributeName, attributes);
    	}
    	return ofGoogle(userNameAttributeName, attributes);
    }

    // 카카오일때
    private static OAuthAttributes ofKakao(String userNameAttributeName, Map<String, Object> attributes) {
    	Map<String, Object> kakao_account = (Map<String, Object>) attributes.get("kakao_account");
    	System.out.println(kakao_account);
    	Map<String, Object> profile = (Map<String, Object>) kakao_account.get("profile");

    	return new OAuthAttributes(attributes,
    			userNameAttributeName,
    			(String) profile.get("nickname"),
    			(String) kakao_account.get("email"));
    }

    // 네이버일때
    private static OAuthAttributes ofNaver(String userNameAttributeName, Map<String, Object> attributes) {
    	Map<String, Object> response = (Map<String, Object>) attributes.get("response");

    	return new OAuthAttributes(attributes,
    			userNameAttributeName,
    			(String) response.get("name"),
    			(String) response.get("email"));
    }

    // 구글일때
    private static OAuthAttributes ofGoogle(String userNameAttributeName, Map<String, Object> attributes) {
    	return new OAuthAttributes(
    			attributes,
    			userNameAttributeName,
    			(String) attributes.get("name"),
    			(String) attributes.get("email"));
    }


    // 닉네임 설정 메서드
    public SiteUser toEntity() {
    	int idx = email.indexOf("@");
    	String nickname = email.substring(0,idx-4) + "****" + email.substring(idx+1, email.length()-4);

    	return new SiteUser(name, email, nickname, "ROLE_USER");
    }
}
로그인하는 서비스가 kakao인지, google인지, naver인지 구분하여 매핑을 시켜준다.
게시판 서비스를 생각했을때, 사용자 닉네임을 표시해주고 싶어서 toEntity메서드를 수정해 주었다.
SessionUserDTO.java
인증된 사용자 정보를 세션에 저장하는 DTO 클래스.
import java.io.Serializable;
import lombok.Getter;

@Getter
public class SessionUserDTO implements Serializable{
	private String name;
	private String email;
	private String nickname;
	private String role;

	public SessionUserDTO(SiteUser siteuser) {
		this.name = siteuser.getName();
		this.email = siteuser.getEmail();
		this.nickname = siteuser.getNickname();
		this.role = siteuser.getRole();
	}

}
DTO 클래스를 따로 만드는 이유?
Entity 클래스를 그대로 사용할 수도 있지만, 따로 만들어 주는 이유는 다음과 같다.
- 엔티티는 다른 엔티티와 관계를 가질 가능성이 있다.
- 엔티티 클래스에 직렬화(Serializable) 코드를 넣으면 직렬화 대상에 관계를 가진 자식들까지 포함되어 추가적인 문제를 발생할 확률이 높아진다.
직렬화란..
Java의 직렬화(Serialize)란?
Java의 직렬화(Serialize)란? Java를 공부하고 Spring을 쓰다보면 계속해서 Serialize를 상속받은 클래스들을 볼 수 있었다. 도대체 직렬화란 무엇일까? 공부를 해보자 직렬화(Serialize) 자바 시스템 내부에
go-coding.tistory.com
자바 직렬화, 그것이 알고싶다. 실무편 | 우아한형제들 기술블로그
{{item.name}} 자바의 직렬화 기술에 대한 대한 두 번째 이야기입니다. 실제 자바 직렬화를 실무에 적용해보면서 주의해야 할 부분에 대해 이야기해보려고합니다. 자바 직렬화 실제 업무에서 사용
techblog.woowahan.com
CustomOAuth2UserService.java
로그인한 사용자의 정보를 활용하는 Service
import java.util.Collections;
import java.util.Optional;
import org.springframework.beans.factory.annotation.Autowired;
import org.springframework.security.core.authority.SimpleGrantedAuthority;
import org.springframework.security.oauth2.client.userinfo.DefaultOAuth2UserService;
import org.springframework.security.oauth2.client.userinfo.OAuth2UserRequest;
import org.springframework.security.oauth2.client.userinfo.OAuth2UserService;
import org.springframework.security.oauth2.core.OAuth2AuthenticationException;
import org.springframework.security.oauth2.core.user.DefaultOAuth2User;
import org.springframework.security.oauth2.core.user.OAuth2User;
import org.springframework.stereotype.Service;
import jakarta.servlet.http.HttpSession;

@Service
public class CustomOAuth2UserService implements OAuth2UserService<OAuth2UserRequest, OAuth2User>{

	@Autowired
	private UserRepository userRepository;

	@Autowired
	private HttpSession httpSession;

	@Override
	public OAuth2User loadUser(OAuth2UserRequest oAuth2UserRequest) throws OAuth2AuthenticationException {

		OAuth2UserService<OAuth2UserRequest, OAuth2User> delegate = new DefaultOAuth2UserService();
		OAuth2User oAuth2User = delegate.loadUser(oAuth2UserRequest);

		String registrationId = oAuth2UserRequest.getClientRegistration().getRegistrationId();
		String userNameAttributeName = oAuth2UserRequest.getClientRegistration().getProviderDetails().getUserInfoEndpoint().getUserNameAttributeName();

		OAuthAttributes attributes = OAuthAttributes.of(registrationId, userNameAttributeName, oAuth2User.getAttributes());

		SiteUser siteuser = saveOrUpdate(attributes);

		httpSession.setAttribute("user", new SessionUserDTO(siteuser));

		return new DefaultOAuth2User(
				Collections.singleton(new SimpleGrantedAuthority("ROLE_USER"))
				, attributes.getAttributes()
				, attributes.getNameAttributeKey());
	}

	// 저장된 사용자 정보면 Update
	private SiteUser saveOrUpdate(OAuthAttributes attributes) {

		SiteUser siteuser = userRepository.findByEmail(attributes.getEmail())
				.map(entity -> entity.update(attributes.getName()))
				.orElse(attributes.toEntity());

		return userRepository.save(siteuser);
	}


	// httpsession (사용자 검증)
	public SessionUserDTO getSession() {

		SessionUserDTO user = (SessionUserDTO) httpSession.getAttribute("user");

		return user;
	}


    // 사용자 조회 메서드 - 이메일
    public SiteUser getUser(String email) {

    	// UserRepository - findByEmail
        Optional<SiteUser> siteUser = this.userRepository.findByEmail(email);

        // 조회 성공
        if (siteUser.isPresent()) {
        	System.out.println("조회 성공");
            return siteUser.get();
        }

        // 조회 실패
        else {
            return null;
        }
    }


}
SecurityConfig.java
스프링 시큐리티 설정
import org.springframework.beans.factory.annotation.Autowired;
import org.springframework.context.annotation.Bean;
import org.springframework.context.annotation.Configuration;
import org.springframework.security.config.annotation.method.configuration.EnableMethodSecurity;
import org.springframework.security.config.annotation.web.builders.HttpSecurity;
import org.springframework.security.config.annotation.web.configuration.EnableWebSecurity;
import org.springframework.security.web.SecurityFilterChain;
import org.springframework.security.web.authentication.AuthenticationSuccessHandler;
import org.springframework.security.web.header.writers.frameoptions.XFrameOptionsHeaderWriter;
import org.springframework.security.web.util.matcher.AntPathRequestMatcher;
import com.human.seoulroad.user.CustomOAuth2UserService;
import com.human.seoulroad.user.CustomAuthSuccessHandler;
import lombok.RequiredArgsConstructor;


@Configuration
@EnableWebSecurity
public class SecurityConfig{

	@Autowired
	private CustomOAuth2UserService customOAuth2UserService;

	@Bean
	public SecurityFilterChain filterChain(HttpSecurity http) throws Exception {
			http.csrf().disable();

			http.authorizeHttpRequests().requestMatchers(
				new AntPathRequestMatcher("/**")).permitAll()

				// h2콘솔관련
				.and()
					.csrf().ignoringRequestMatchers(
						new AntPathRequestMatcher("/h2-console/**"))
				.and()
					.headers()
					.addHeaderWriter(new XFrameOptionsHeaderWriter(
							XFrameOptionsHeaderWriter.XFrameOptionsMode.SAMEORIGIN))

				// 로그인/로그아웃 관련
				.and()
					.logout()
					.logoutUrl("/user/logout")
					.logoutSuccessUrl("/")
					.invalidateHttpSession(true)
				.and()
					.oauth2Login()
					//.defaultSuccessUrl("/")
					.successHandler(new CustomAuthSuccessHandler())
					.userInfoEndpoint()
					.userService(customOAuth2UserService)
				;
		return http.build();
    }

}
이슈 : WebSecurityConfigurerAdapter Deprecated...
우리 프로젝트는 Spring Security 6을 사용했기 때문에...아래 문서를 참고하여 방식을 달리해줬다.
누구처럼 검색하면서 4시간이나 날리지 말것..
Spring | Home
Cloud Your code, any cloud—we’ve got you covered. Connect and scale your services, whatever your platform.
spring.io
@Configuration
- 스프링의 환경설정 파일임을 의미하는 애너테이션
@EnableWebSecurity
- 모든 요청 URL이 스프링 시큐리티의 제어를 받도록 만드는 애너테이션
new AntPathRequestMatcher("/**")).permitAll();
- 로그인을 하지 않더라도 모든 페이지에 접근할 수 있다. (로그인이 필요한 서비스는 따로 로직을 마련해두었다.)
.logoutUrl("user/logout")
- 우리는 로그아웃 버튼 클릭 시 로그아웃 페이지로 이동하게끔 처리를 해두었기 때문에, 따로 url을 지정해 두었다.
.invalidateHttpSession(true)
- 로그아웃시 세션 정보를 삭제함
.defaultSuccessUrl("")
- 로그인 성공 시 이동할 url
.successHandler(new CustomAuthSuccessHandler())
- 로그인시 추가적인 조작이 필요해서 따로 추가해주었다.
▼ 관련 포스팅
[프로젝트 리뷰] Spring Security 로그인 후 이전 페이지로 이동 - Referer, addFlashAttribute
개발환경 STS 4.16.1 Springboot 3.0.1 (springsecurity6) Thymeleaf Java 17 JPA Gradle 7.6 관련 포스팅 - 소셜 로그인 구현 [프로젝트 리뷰] Spring Security OAuth2 소셜 로그인(구글, 네이버, 카카오) 구현 개발환경 STS 4.16.
rkgh17.tistory.com
.userInfoEndpoint
- 로그인 성공 후 사용자 정보를 가져올 때의 설정
.userService(customOAuth2UserService)
- 로그인 성공 시 우리가 생성한 customOAuth2UserService로 후속처리를 해준다는 의미
Controller
UserController.java
import java.util.Map;
import org.springframework.security.core.Authentication;
import org.springframework.security.core.context.SecurityContextHolder;
import org.springframework.security.web.authentication.logout.SecurityContextLogoutHandler;
import org.springframework.stereotype.Controller;
import org.springframework.ui.Model;
import org.springframework.web.bind.annotation.GetMapping;
import org.springframework.web.bind.annotation.RequestMapping;
import org.springframework.web.servlet.support.RequestContextUtils;
import jakarta.servlet.http.HttpServletRequest;
import jakarta.servlet.http.HttpServletResponse;


@Controller
@RequestMapping("user")
public class UserController {

	@GetMapping("login")
	public String login(HttpServletRequest request) {

		/* 로그인 성공 시 이전 페이지로 이동 */
		String uri = request.getHeader("Referer");

		if (uri==null) {
			// null일시 이전 페이지에서 addFlashAttribute로 보내준 uri을 저장
			Map<String, ?> paramMap = RequestContextUtils.getInputFlashMap(request);
			uri = (String) paramMap.get("referer");

			// 이전 url 정보 담기
			request.getSession().setAttribute("prevPage", uri);

		}else {
			// 이전 url 정보 담기
			request.getSession().setAttribute("prevPage", uri);
		}

		return "login";
	}

	@GetMapping("logout")
	public String logoutpage() {

		return "logout";
	}

	@GetMapping("logout/do")
	public String logout(HttpServletRequest request, HttpServletResponse response) throws Exception{
		Authentication auth = SecurityContextHolder.getContext().getAuthentication();

		if (auth != null) {
			new SecurityContextLogoutHandler().logout(request, response, auth);
		}
		return "redirect:/main";
	}

}
로그인 / 로그아웃 시 여러 상황들을 따로 조작해두었기 때문에 위와 같이 코드를 작성했다.
Reference
[Spring Security] 스프링 부트 OAuth2-client를 이용한 소셜(구글, 네이버, 카카오) 로그인 하기
저번 시간에는 직접 컨트롤러에서 요청을 구현하여서 OAuth2 인증을 처리해봤습니다. 이번 시간에는 OAuth2-client 라이브러리를 이용해서, 소셜 로그인 API를 구현해보도록 하겠습니다. 개발 환경 Int
iseunghan.tistory.com